News & Events
Why Revit Elements Become Invisible: Complete Guide to Fixing View Issues- Revit elements invisible
Revit elements invisible: One of the most common frustrations in Revit is when elements suddenly become invisible in a view. This issue often appears random, but it almost always has a specific cause rooted in the Revit visibility graphics hierarchy or view-specific settings. Ignoring invisible elements can cause serious issues in documentation, clash detection, and quantity schedules, making it essential to understand the underlying causes.
Elements may be hidden due to disabled categories, active filters, wrong phases, workset settings, temporary hides, view range limits, or graphic display settings. Large models or multi-user projects increase the likelihood of invisible elements because multiple layers of control interact in complex ways. For instance, a wall visible in one plan may not appear in another elevation view, confusing team members and delaying workflow.
This guide focuses on the most common causes of invisible elements, providing actionable strategies to identify and correct each scenario. By understanding the hierarchy of visibility and systematically checking each layer—from categories to overrides—users can quickly restore missing elements. Applying these solutions ensures consistent views, accurate documentation, and professional-quality models, saving time and avoiding errors across the project lifecycle.
Learn more: Revit Classes Comparison: In-Person vs Online with Visuals
Category and Subcategory Visibility Issues
Many invisible elements are caused by disabled categories or subcategories in the Visibility/Graphics (VG) dialog. Revit allows users to hide entire categories, such as walls, doors, or annotations, or their subcategories, like wall finishes or furniture types. When a category is turned off, all elements in that category become invisible in the view, even if they exist in the model.
To troubleshoot, open View Properties → Visibility/Graphics (VG) and check both category and subcategory settings. Make sure essential categories are enabled and visible. It’s important to inspect whether the problem affects a single view or multiple views, as VG settings are view-specific. In multi-view projects, consistent VG templates prevent elements from being unintentionally hidden.
Additionally, subcategory overrides—like turning off furniture lines or annotation symbols—can also cause elements to disappear. Re-enabling these ensures that elements display as intended. Maintaining a standard category/subcategory configuration across views minimizes confusion, reduces the time spent searching for missing elements, and maintains visibility consistency throughout the project.
Phase and Phase Filter Problems
Invisible elements often result from incorrect phase assignments or phase filters. Each element in Revit is assigned to a phase, such as Existing, Demolished, or New Construction. Phase filters control which phases are visible in a view. If the active filter does not include the element’s phase, it will not appear, regardless of category visibility.
For example, a wall assigned to “New Construction” may disappear in a plan view set to display only “Existing” elements. Misaligned or inconsistent phase filters across views frequently lead to confusion, especially in renovation projects.
To fix this, go to View Properties → Phase and Phase Filter, and verify both the element’s phase and the active filter. Ensure the filter includes the phases that need to be visible. Establishing consistent phase management standards across a project prevents hidden elements and reduces errors during documentation. Accurate phase visibility is essential for construction coordination, quantity takeoffs, and maintaining the integrity of model views.
Workset and Linked File Visibility
In multi-user or large projects, worksets and linked files are a frequent cause of invisible elements. Elements assigned to inactive worksets won’t appear in the view. Similarly, elements in linked models may be invisible if the link is unloaded or the linked workset is hidden.
To resolve this, open Worksets from the Collaborate tab and ensure relevant worksets are active and visible. For linked files, verify that the link is loaded, visible, and that the host view’s VG settings allow linked categories to display. Problems often occur when different team members work on separate worksets without coordination, causing elements to vanish unexpectedly in others’ views.
Best practice involves establishing workset standards, coordinating who controls which worksets, and routinely auditing visibility in both host and linked models. Proper management ensures that elements in worksets or links are consistently visible, minimizing the risk of missing components and improving collaboration across teams.
Learn more: Learn Revit: Animated Course vs Traditional Tutorials 2025
View Range and Crop Region Effects
Elements may be invisible because they are outside the View Range or Crop Region. View Range defines the vertical extents of a plan view, including top, bottom, and cut plane, while Crop Region limits the visible area horizontally. Misconfigured settings can hide walls, floors, ceilings, or other objects.
Check View Properties → View Range and ensure the top, cut plane, and bottom levels encompass all relevant elements. For crop regions, toggle the crop box and adjust extents to include missing objects. Large projects or multi-level buildings are particularly sensitive to these settings.
Understanding the interaction between view range and crop regions prevents elements from disappearing due to simple vertical or horizontal limits. Properly setting these ensures all necessary components are visible, improves model readability, and reduces time spent troubleshooting missing geometry.
Temporary Hide/Isolate and Element Overrides
Elements may also be invisible due to Temporary Hide/Isolate commands or Element Overrides. Temporary hides are applied for focus work and may not be obvious after returning to the full view. Element Overrides can hide elements in a specific view while leaving other views unaffected.
Use the Reveal Hidden Elements tool in the View Control Bar to identify hidden elements. Unhide them via Unhide in View → Elements, and reset overrides if necessary. Checking this systematically avoids accidentally leaving elements invisible.
Proper management of temporary hides and overrides ensures visibility is controlled, prevents accidental omission in documentation, and allows for efficient editing without disrupting view-specific graphics or model-wide visibility standards.
Filters That Hide Elements
Filters in VG are powerful but can unintentionally hide elements. Filters work by criteria, such as category, parameter value, or phase. Misconfigured filters may hide walls, furniture, or annotations unexpectedly.
Check View → Visibility/Graphics → Filters, verify which elements are affected, and review the criteria for each filter. Adjust conditions to ensure essential elements are displayed. Always test in multiple views to prevent unintentional hiding.
Correct use of filters allows targeted visibility adjustments while avoiding invisible elements. Misuse can lead to frustration, inconsistent graphics, and wasted time searching for missing objects. Standardizing filters across views maintains clarity and professional output.
Learn more: Revit vs AutoCAD 2025: Which Is Worth Learning?
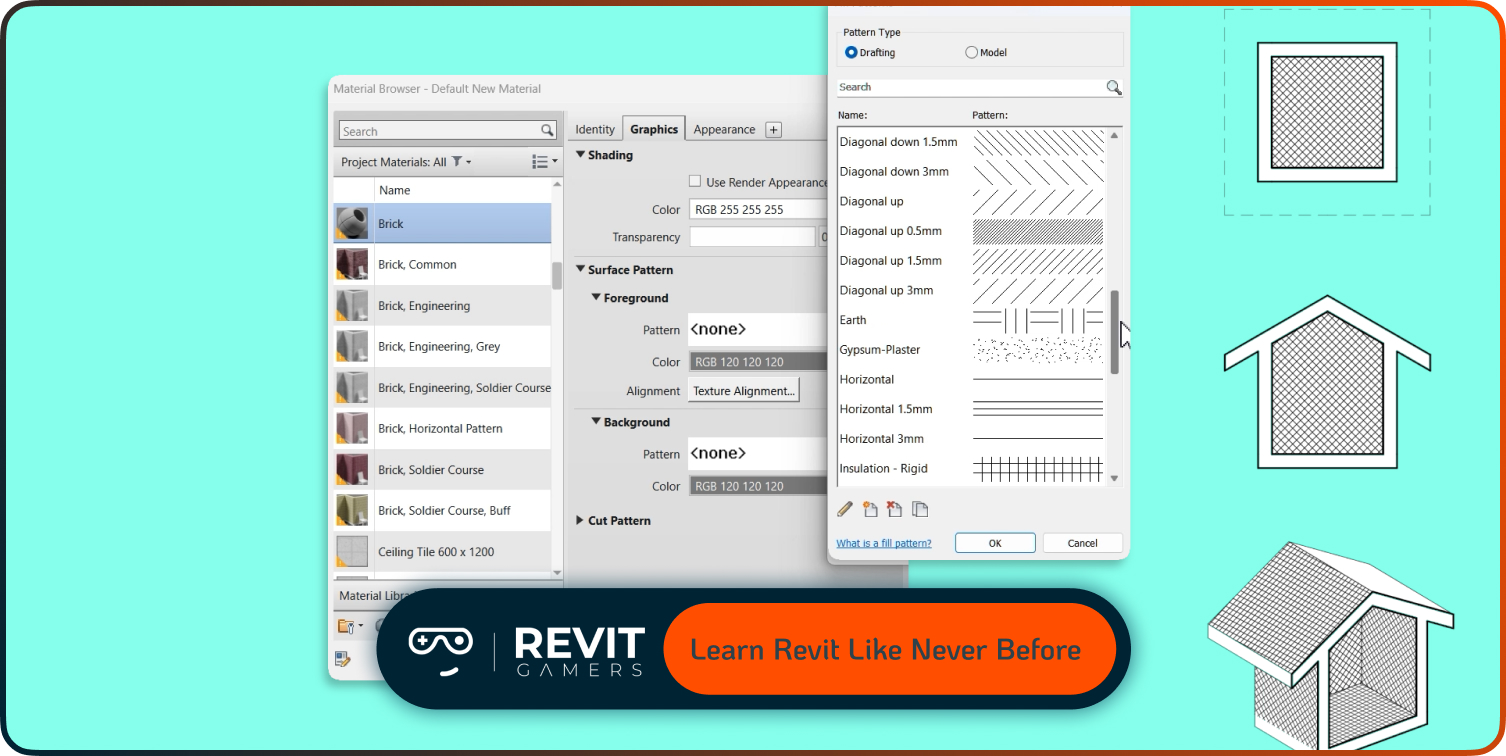
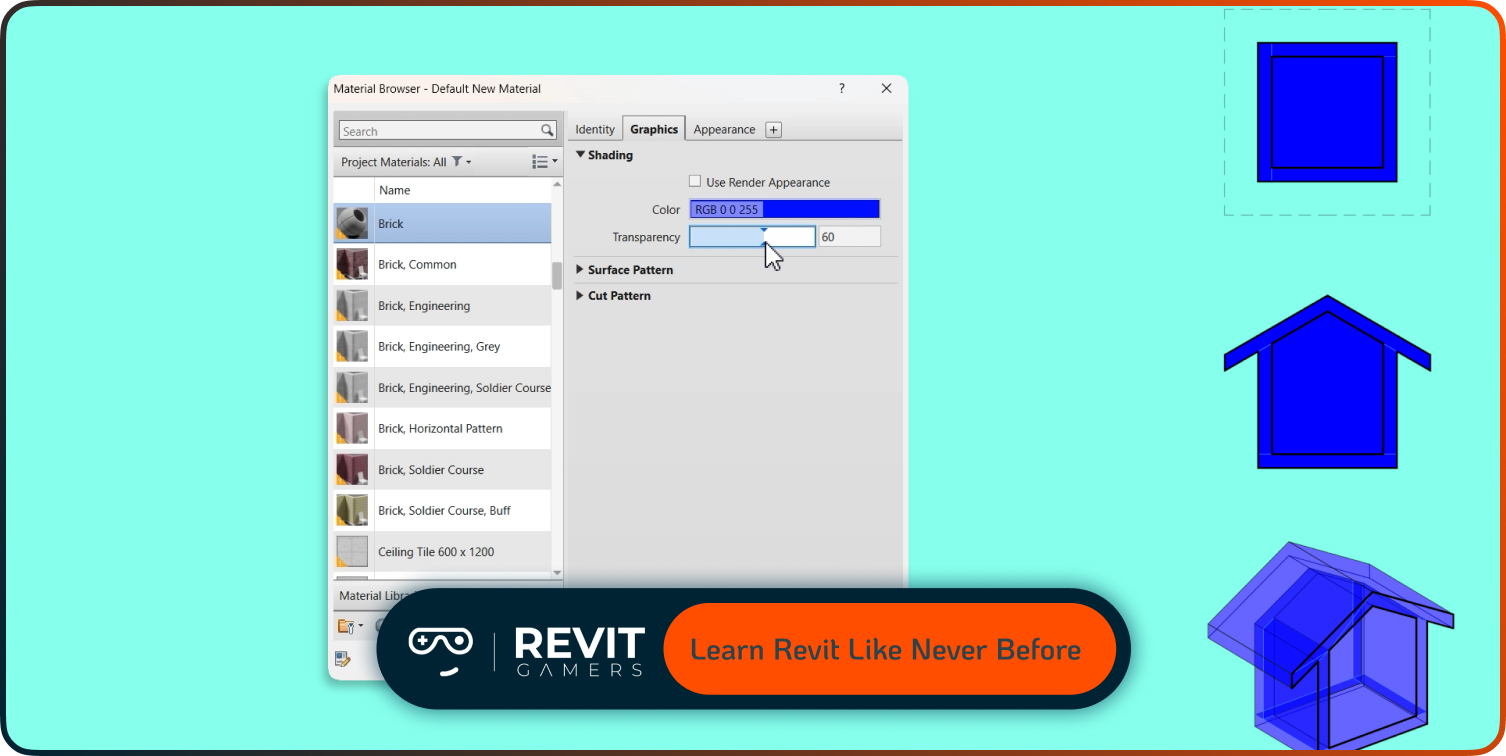
Detail Level and Graphic Display Settings
Elements may be invisible if the Detail Level (Coarse, Medium, Fine) or Visual Style does not support their display. For example, furniture or small annotations may vanish in Coarse view, while linework may not render in certain visual styles.
To resolve, adjust View Properties → Detail Level and Visual Style, ensuring elements are compatible with the chosen setting. Verify that annotation or model lines are visible at all detail levels needed.
Proper management of detail level and graphics settings ensures elements appear consistently, avoids confusion, and maintains professional-quality documentation across all views and scales.
Revit elements invisible: Best Practices to Prevent Elements from Becoming Invisible
Preventing invisible elements requires a systematic, standardized workflow. Ensure category and subcategory settings are consistent, manage phases and filters carefully, coordinate worksets, and monitor linked files. Regularly audit views using Reveal Hidden Elements, maintain proper view ranges, and use detail level and graphic settings intentionally.
Document team standards for visibility, and educate collaborators on temporary hides, overrides, and filters. By applying these practices, teams minimize invisible elements, maintain reliable documentation, and streamline collaboration. A proactive approach to visibility ensures professional, accurate, and construction-ready Revit models.
Leave a Reply
You must be logged in to post a comment.